
The iPhone Pro-Setup: 3 Steps to high Quality photos
The best camera in the world is the one you have with you in your pocket, as long as you know how to use it.

Set your phone up for greatness.
1. Level the Playing Field
The fastest way to spot an amateur photo is a crooked horizon. Your iPhone has a built-in "flight instrument" to fix this instantly.
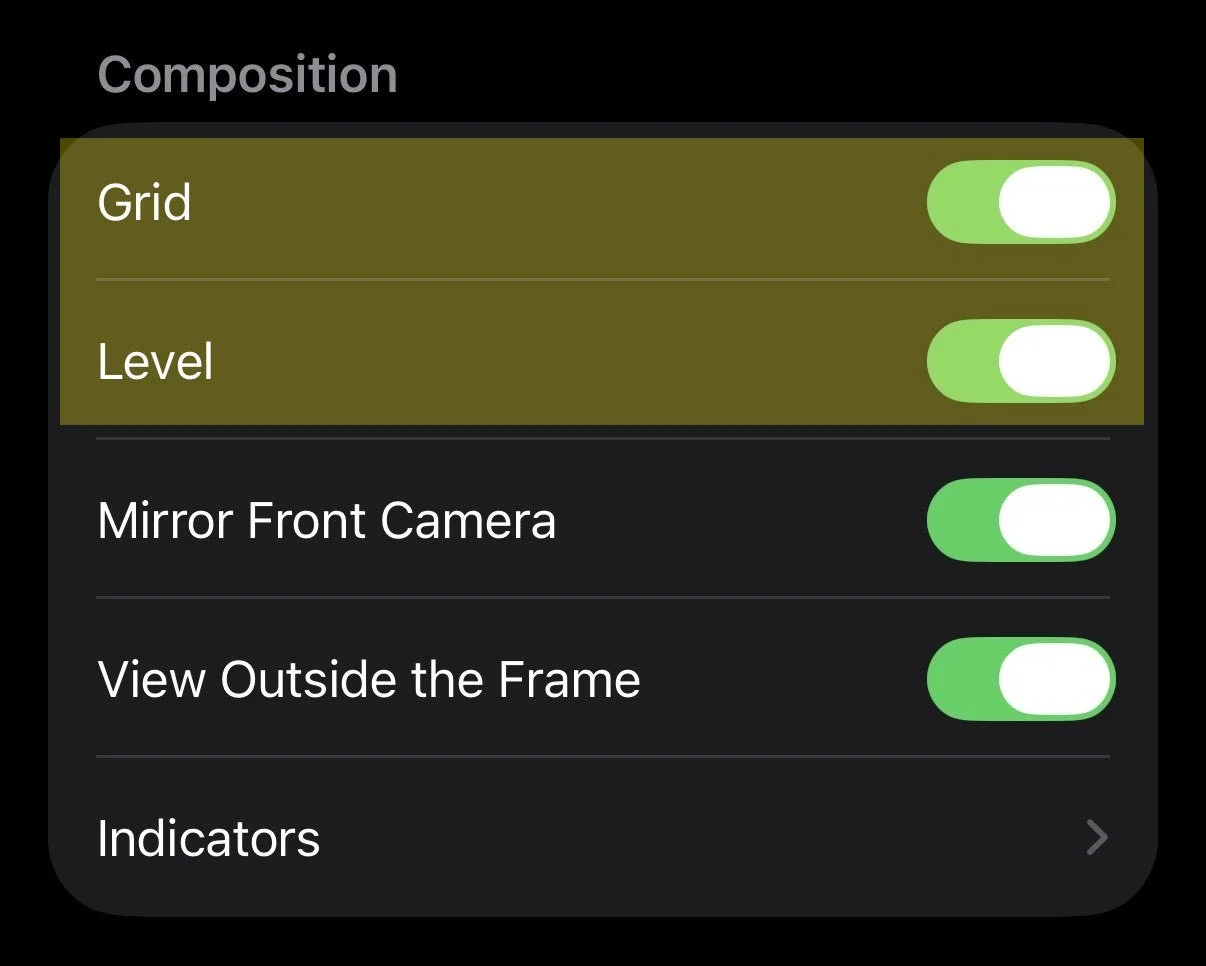
The Setup: Go to Settings > Camera and toggle both Grid and Level to ON.
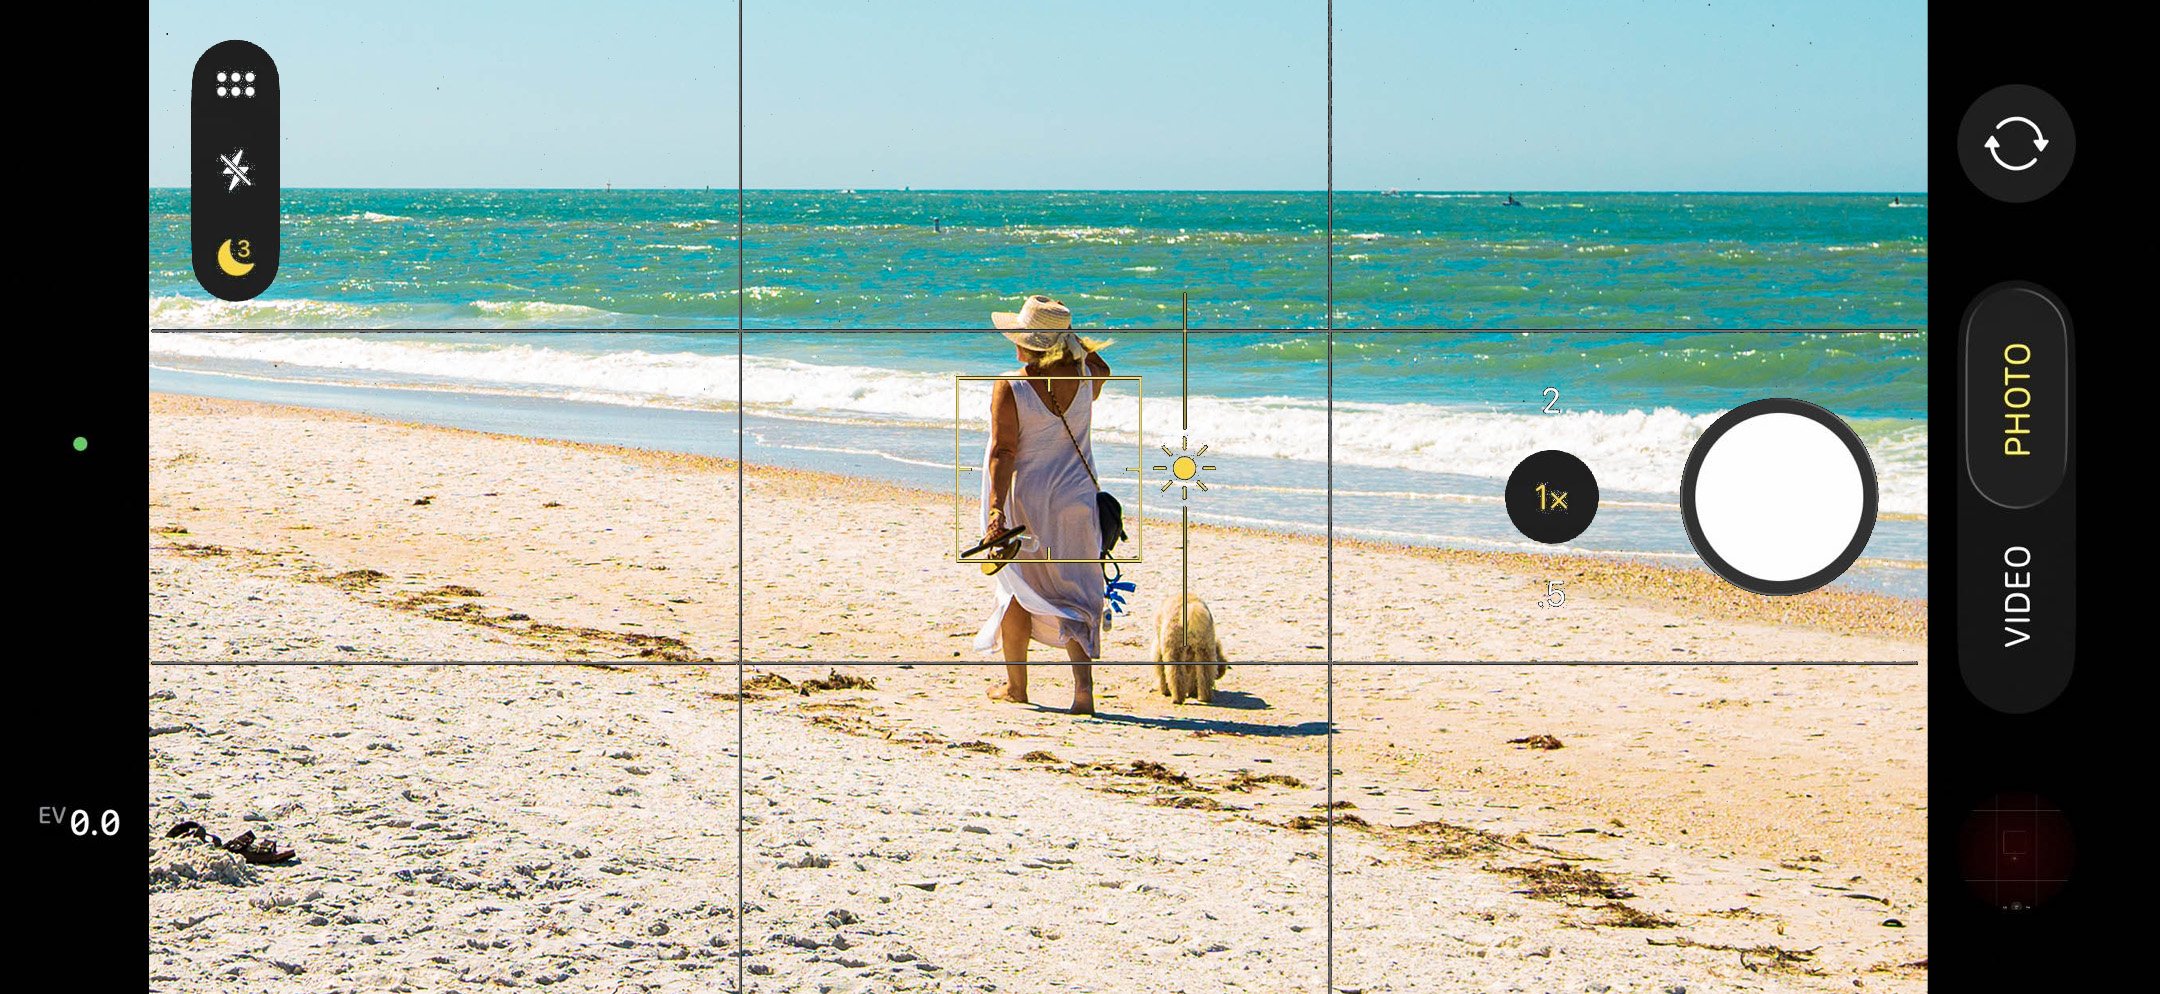
The Pro Move: When you hold your phone, a faint white line (and a 3x3 grid) will appear. Tilt your phone until that center line turns Yellow.
The Result: A perfectly level, balanced shot that saves your image resolution by eliminating the need to "crop and rotate" in editing.

2. Lock Your Focus & Color (AE/AF Lock)
If you move your phone even an inch, the "Auto" settings will try to refocus and change the color temperature. This causes "flicker" in videos and inconsistent colors in photos.
The Move: Tap the most important part of your product on the screen. A yellow box will appear. Press and hold that box for two seconds until you see "AE/AF LOCK" appear in yellow at the top.
The Adjustment: Once locked, look for the small Sun Icon next to the yellow box. Slide your finger down on the screen to lower the brightness (exposure) or up to brighten it.
The Result: Total consistency. By locking the "Auto Exposure" and "Auto Focus," your phone won't freak out if a cloud passes by or if you move the camera. You get that moody, high-end "Small House" look every single time.
3. Stop "Pinching" to Zoom (use stepped zooms)
When you "pinch" the screen to zoom in, you aren't actually getting closer. You’re just cropping the photo and making it grainy. To keep your product shots sharp and "high-definition," you need to use the actual physical lenses on your phone.
The Move: Look for the numbers right above the shutter button (0.5, 1x, 2, 3).
The "Pro" Choice: * For Products: Use the 2x or 3x lens and step back. This creates "compression," which makes the product look more natural and less distorted than the wide-angle lens.
For Landscapes/Big Action: Use the 0.5 (Ultra-Wide) to get that epic, expansive look.
The Result: You’re using the actual glass optics of the iPhone instead of a "digital zoom." This keeps your edges sharp and your textures crisp, which is exactly what you need for professional branding.
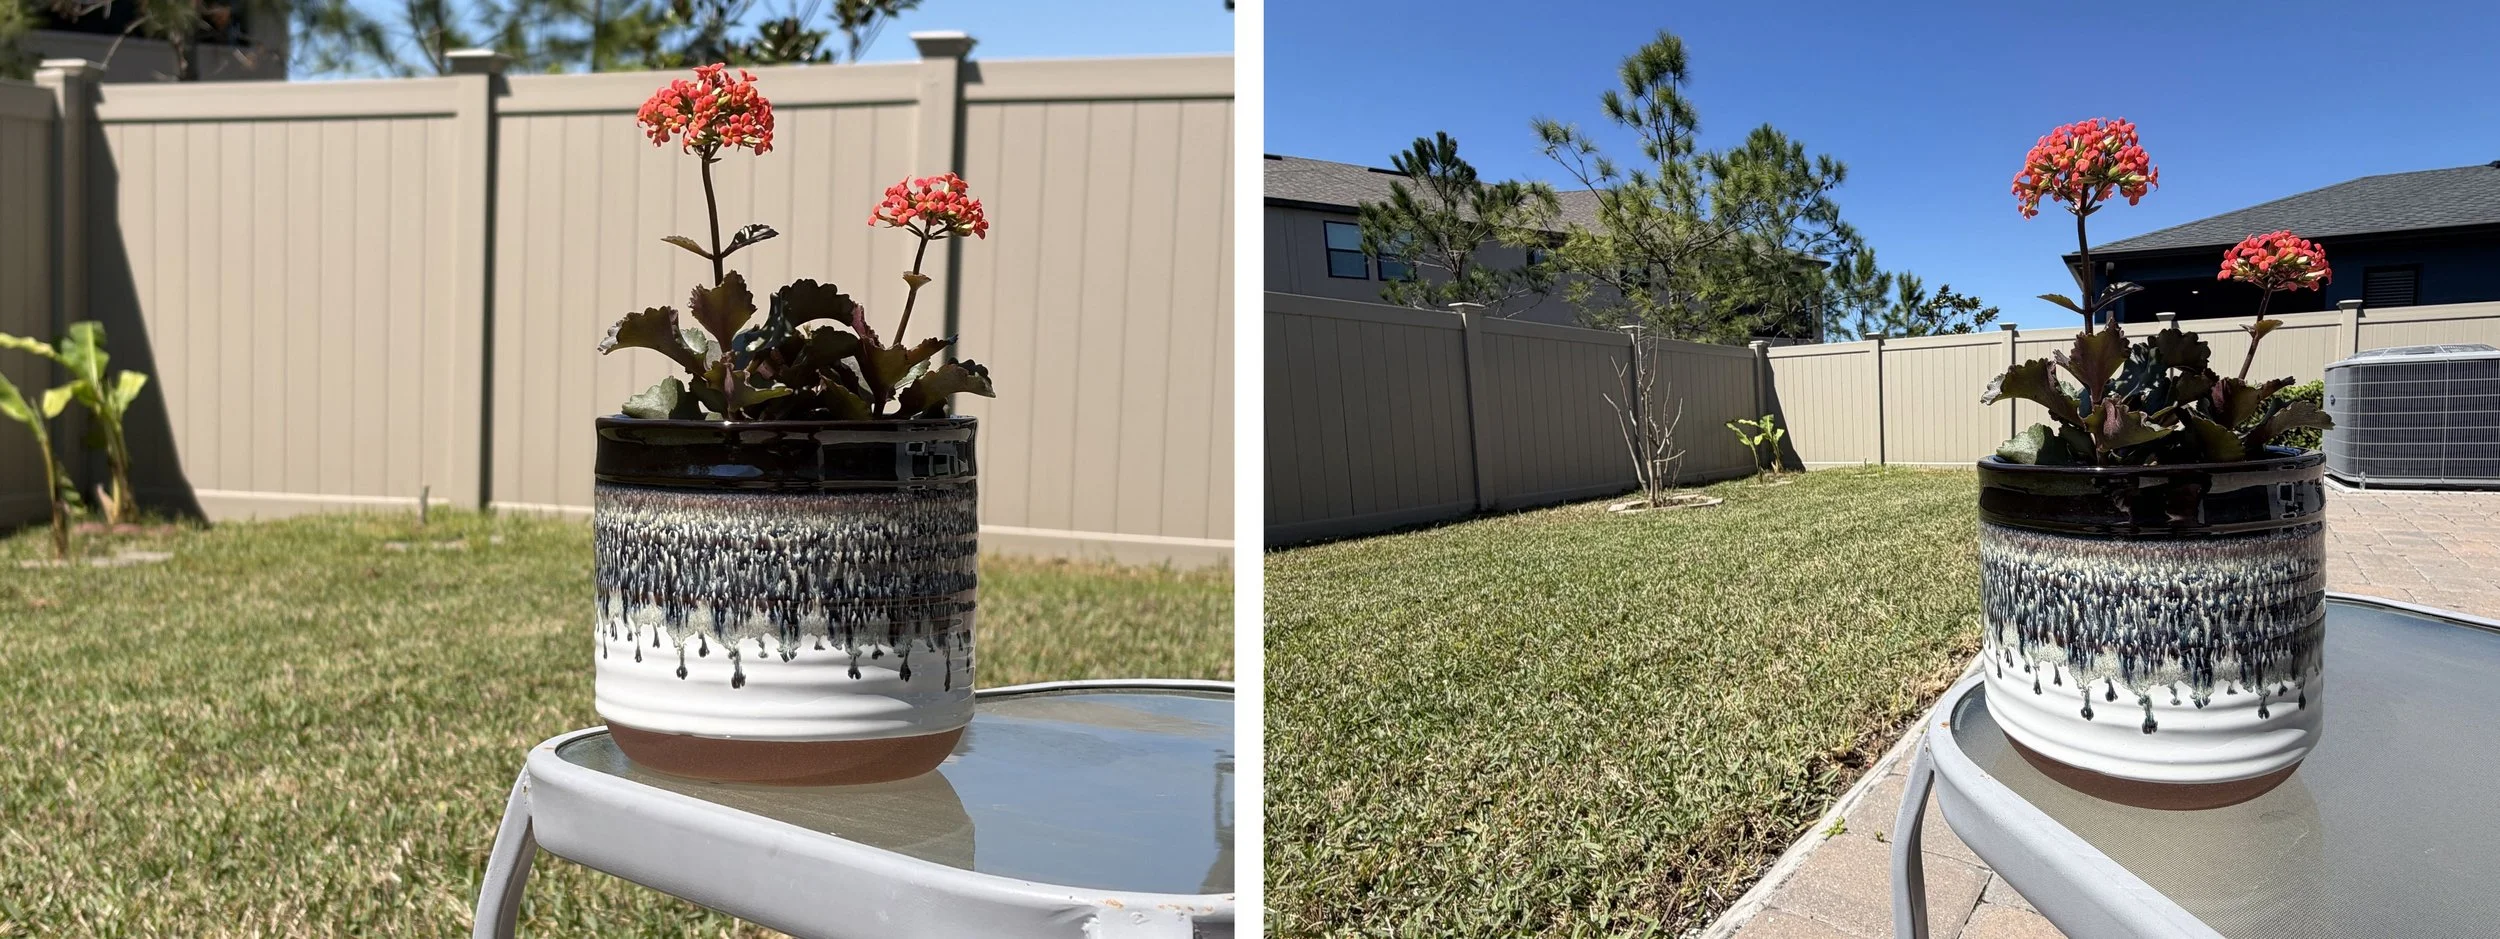
Left Image (2x Telephoto): By stepping back and using the 2x lens, we achieve Lens Compression. This flattens the image, making the product look proportional and heroic. It also naturally softens the background (Depth of Field), forcing the viewer’s eye to stay exactly where it belongs: on your product.
Right Image (.5x Ultra-Wide): Notice the "bubble" distortion. The fence lines curve, the product looks small, and the background is cluttered and distracting. This is a "snapshot," not a brand asset.
A final note from Small house media
These three shifts take less than 15 seconds to execute, but they save you hours of frustration in editing. By getting the technicals right in the camera, you’re creating assets that are ready for high-end ads, social media, and web design immediately.